
Step 1
Open Live Transcription
From the HeliQore navigation menu, select Live Transcription. The page opens with controls for the session, audio source, transcription preferences, and live transcript.
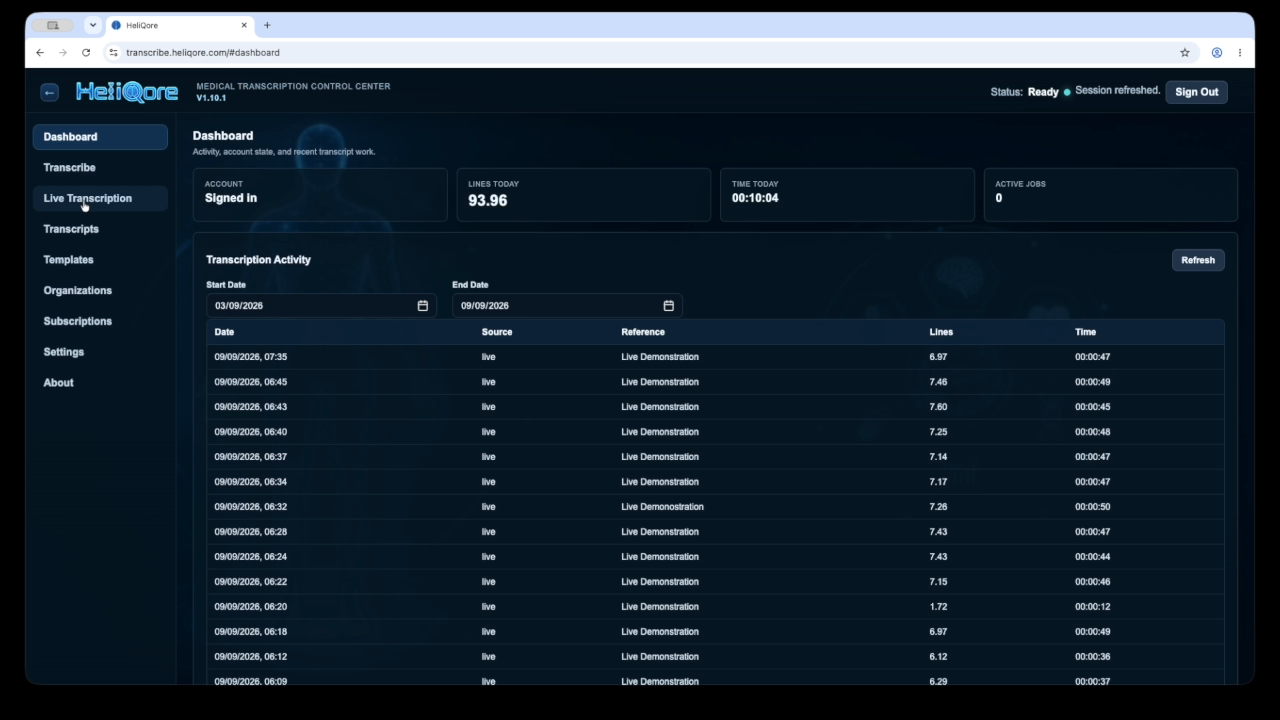
Live Transcription Workflow
Follow this visual tutorial to configure a live session, capture speech from your microphone, and review the saved transcript. Prefer video? Watch the video guide.
Sign in to HeliQore using a supported web browser and connect the microphone you want to use. Your browser may ask for microphone access when the session starts. Confirm that you have permission to record and transcribe the conversation, and handle patient and confidential information according to your organisation’s privacy requirements.
Step 1
From the HeliQore navigation menu, select Live Transcription. The page opens with controls for the session, audio source, transcription preferences, and live transcript.
Step 2
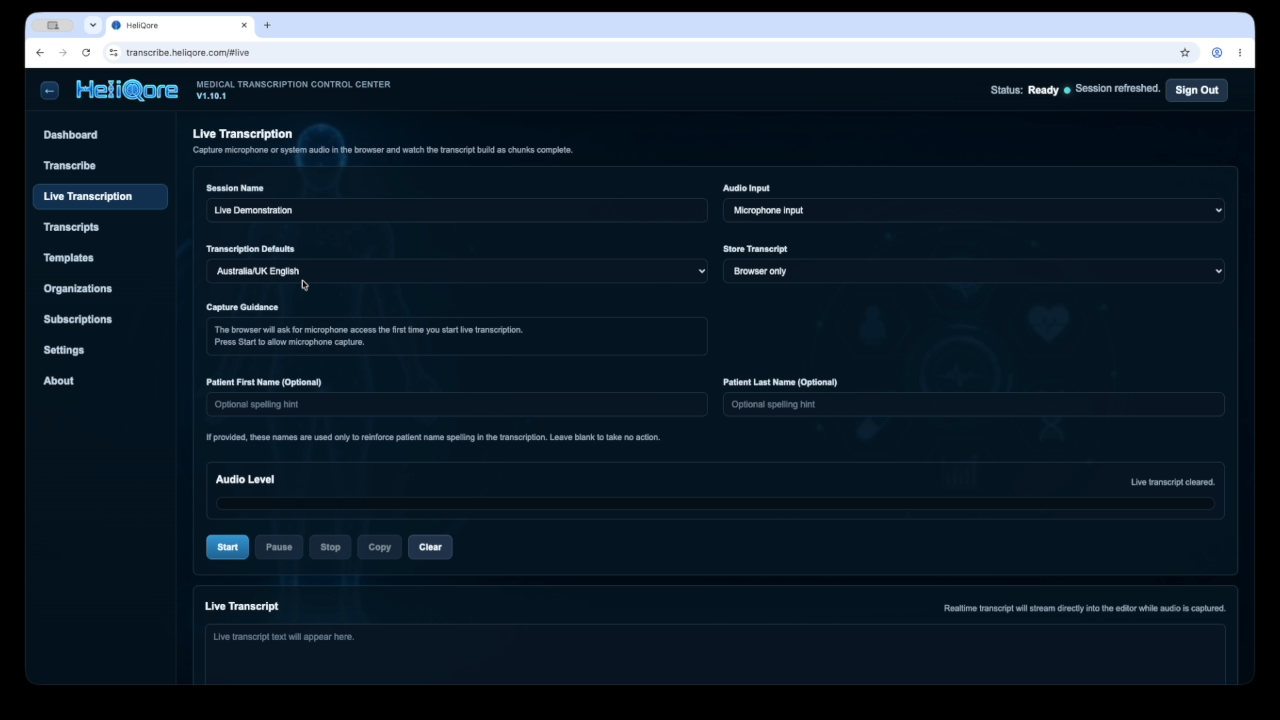
Enter a clear Session Name, then choose the required Audio Input. Select the appropriate language under Transcription Defaults and choose how long HeliQore should store the transcript.
For microphone capture, select Microphone input. For system or tab audio, choose the matching source and follow the browser’s sharing prompt.
Step 3
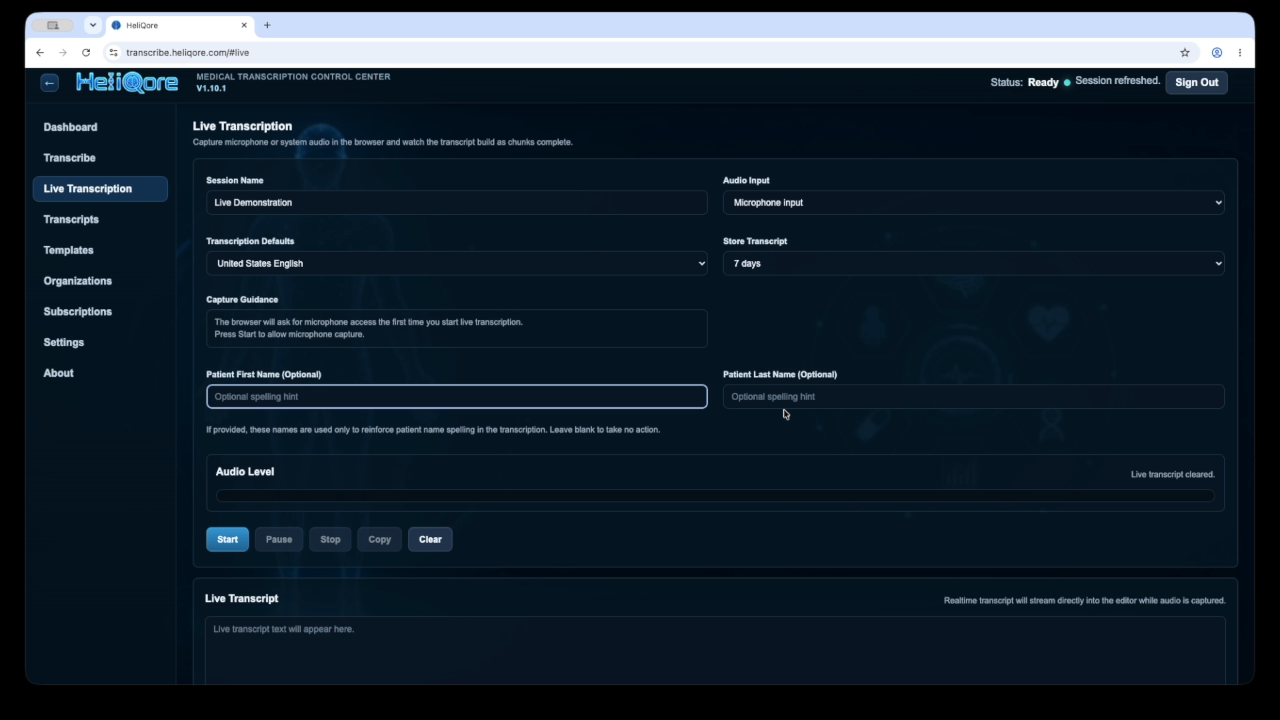
Review the Capture Guidance for the selected audio source. If useful, enter the patient’s first and last names as optional spelling hints. These fields reinforce name spelling in the transcript; leave them blank when they are not needed.
Step 4
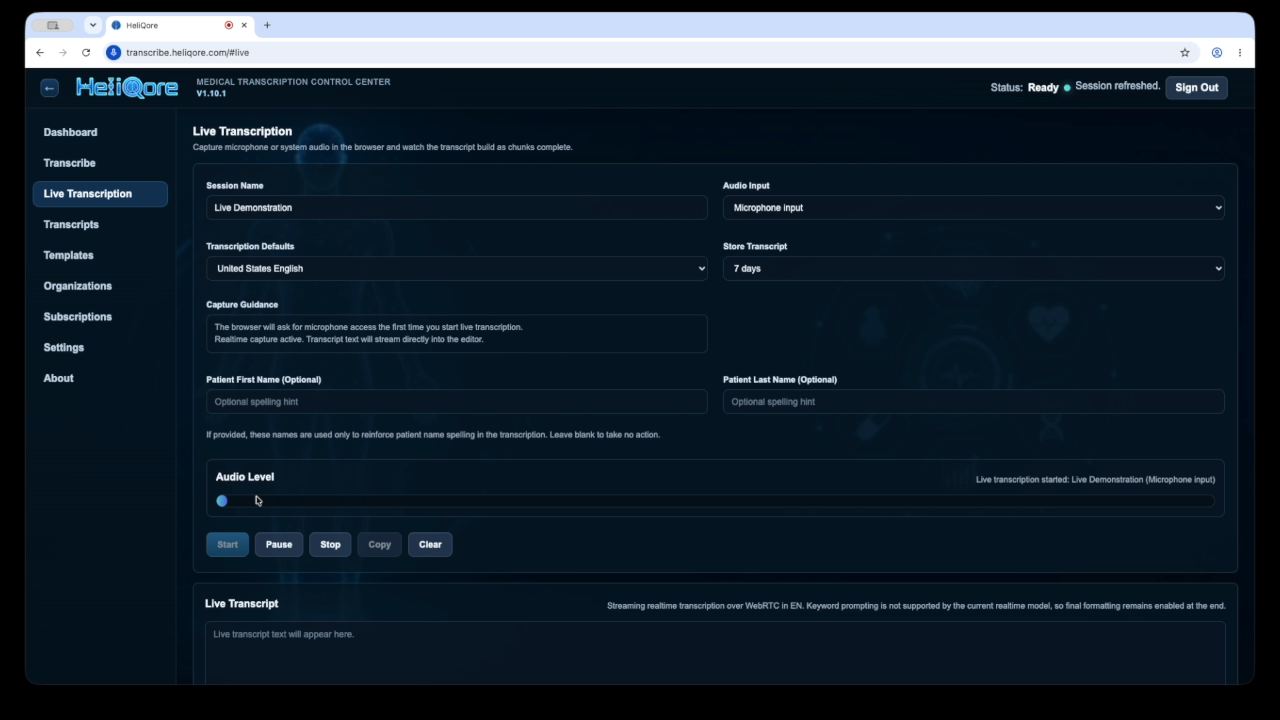
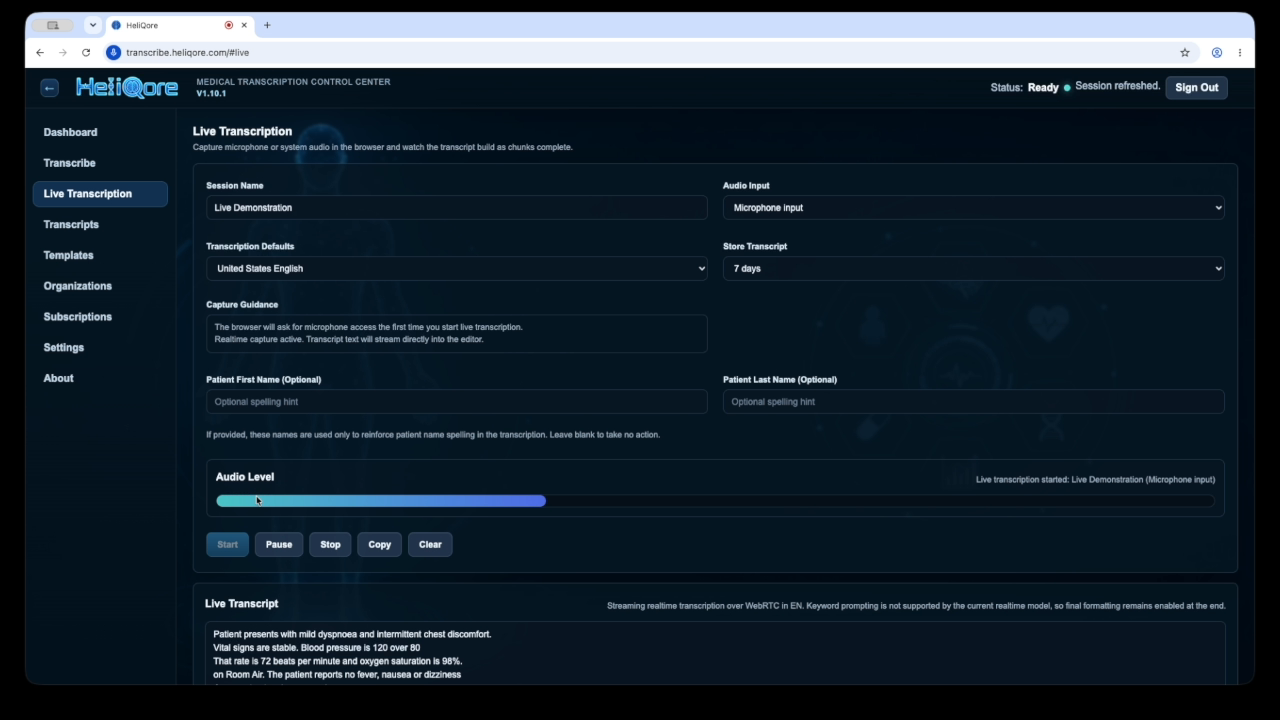
Select Start. If the browser asks for microphone permission, allow access to the microphone you selected.
Confirm that the Audio Level indicator moves as you speak. This shows that HeliQore is receiving sound. You can pause or stop the session using the controls below the indicator.
Step 5
Speak clearly at a consistent pace. As the session continues, recognised text appears in the Live Transcript panel. Watch the panel to confirm that the audio is being transcribed and use Pause if the session needs to be interrupted.
Avoid speaking passwords or information that is not required for the clinical record.
Step 6
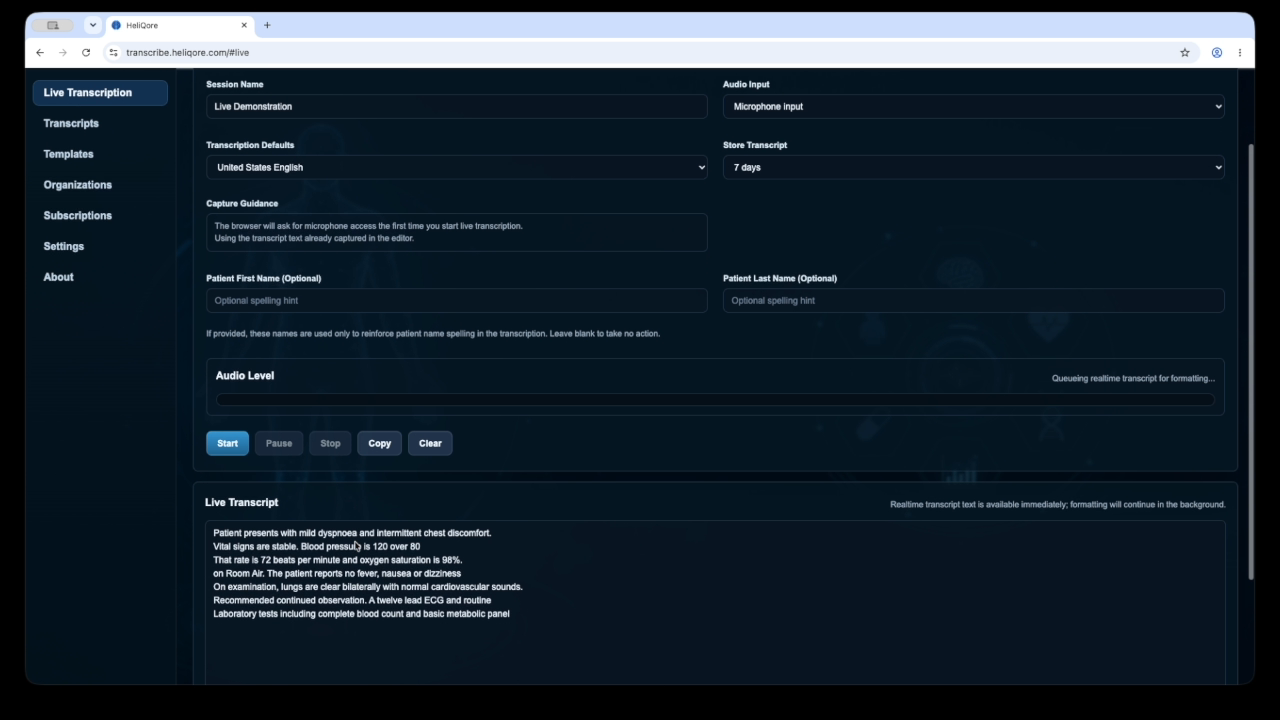
When dictation is complete, select Stop. Confirm that the page reports that live transcription has stopped and that the complete text remains visible for review.
Step 7
Select Transcripts from the navigation menu, then choose the completed session in the Transcript Library. Review the text carefully before relying on or sharing it.
From this page, you can copy or save the transcript, download the audio or DOCX file, apply a template, or delete the transcript using the available actions.
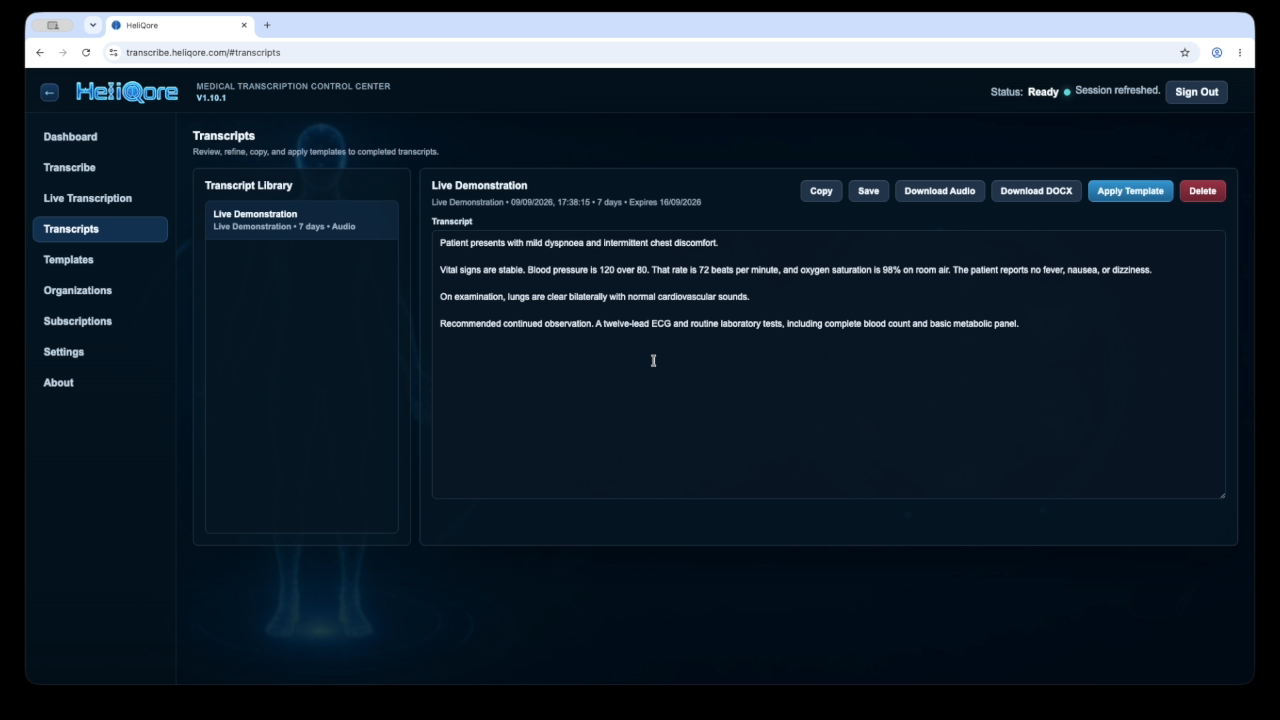
Your live session has been captured and saved to the Transcript Library. Always review medical terminology, measurements, negation, and patient details before using the transcript in clinical documentation.
Open HeliQore Watch the video guide
Need a file-based workflow instead? Read how to transcribe an audio or video file.